How to Make a Balloon Arch
Complete DIY Guide: Step-by-step tutorial from planning to professional finishing techniques.
Balloon arches have become a must-have decoration for birthdays, weddings, baby showers, and corporate events. The good news? You don’t need to hire a professional—with the right supplies and technique, anyone can create a stunning balloon arch at home.
This guide is based on techniques we’ve refined over 38 years of supplying professional balloon decorators. We’ve helped thousands of customers—from first-time DIYers to experienced event planners—create beautiful arches using the same methods you’ll learn below. Whether you’re making a simple 6-foot backdrop or an elaborate 20-foot entrance arch, these steps will help you achieve professional results.
Quick Overview
Time needed: 2-4 hours depending on size
Difficulty: Beginner-friendly
Supplies: 150-200 latex balloons, decorating strip, electric pump, glue dots
Steps: Plan colors → Inflate → Attach to strip → Shape → Fill gaps
Planning Your Balloon Arch
Choose Your Arch Style
- Organic/Asymmetrical: Mixed sizes and colors for a natural, trendy look
- Classic Spiral: Two alternating colors in a uniform pattern
- Ombre/Gradient: Colors transition from light to dark
- Garland Style: Draped like a swag rather than a full arch
Select Your Colors
The most visually appealing arches use 3-5 colors. Include one metallic or chrome color for added pop.
Determine Your Size
- Small (6-8 ft): Photo backdrops, dessert tables
- Medium (10-12 ft): Doorways, cake table backgrounds
- Large (15+ ft): Entrance arches, stage decorations
Essential Supplies
- Latex balloons (mix of 5″, 11″, and 16″)
- Balloon decorating strip
- Electric balloon pump
- Balloon glue dots
- Fishing line or ribbon
- Command hooks (for mounting)
How Many Balloons Do You Need?
| Arch Size | Total | 11″ | 5″ Fillers | 16″ Accents |
|---|---|---|---|---|
| Small (6-8 ft) | 80-100 | 50-60 | 20-30 | 10 |
| Medium (10-12 ft) | 150-200 | 100-120 | 40-60 | 15-20 |
| Large (15+ ft) | 250-400 | 180-280 | 50-80 | 25-40 |
Need a precise count? Use our Balloon Quantity Calculator.
Step-by-Step Instructions
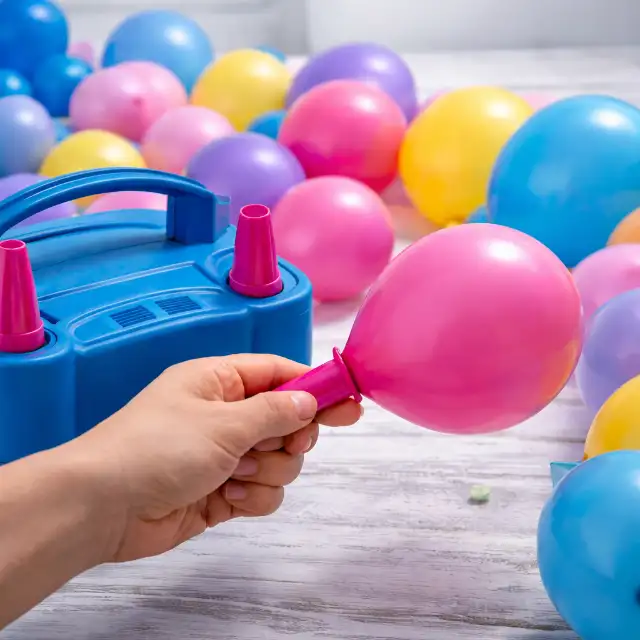
1 Inflate Your Balloons
- Separate balloons by color and size
- Using your electric pump, inflate to varied sizes:
- 11″ balloons: Some fully, some to 75%, some to 50%
- 5″ balloons: Inflate fully
- 16″ balloons: Inflate to 90-100%
- Tie off each balloon immediately
- Sort by size into separate piles
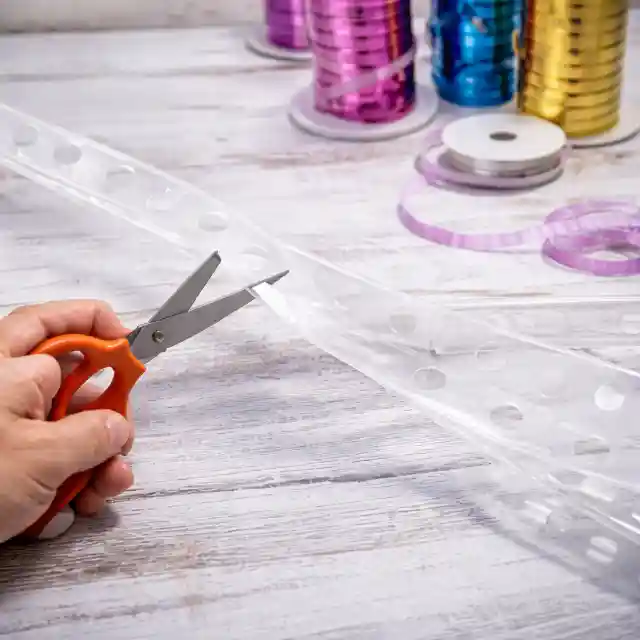
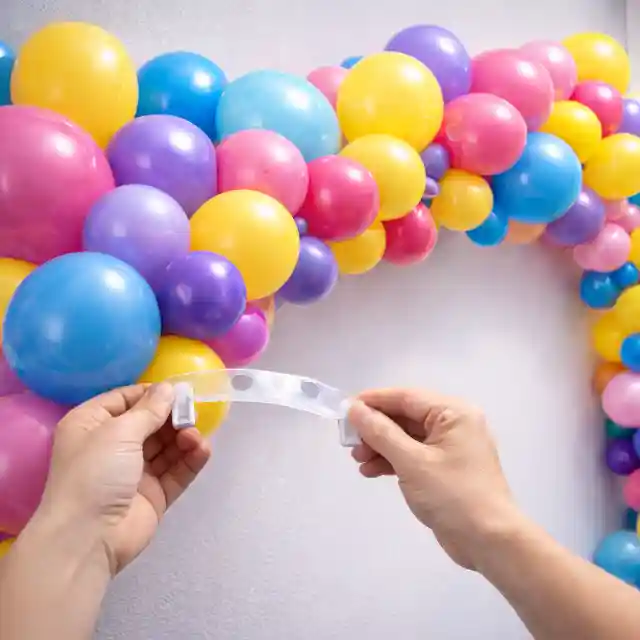
2 Prepare Your Decorating Strip
- Measure and cut strip to desired length (add 2 feet for securing)
- Identify which holes are larger for better hold
- Plan your color sequence if doing a pattern
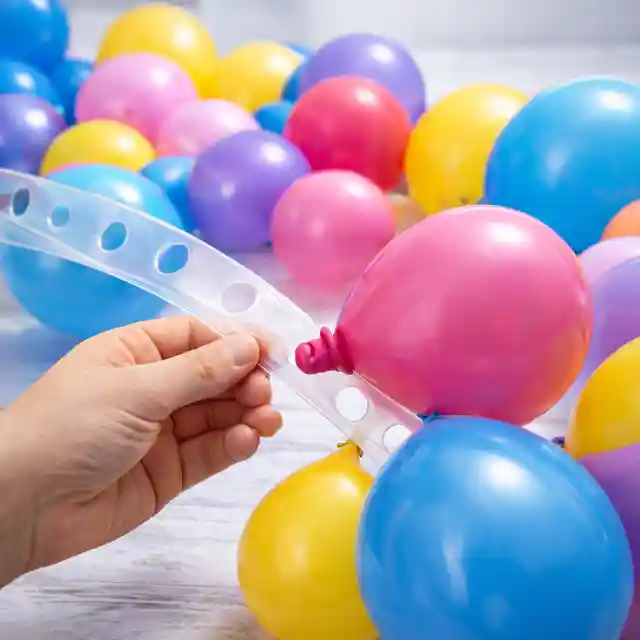
3 Attach Balloons to Strip
- Start with larger 11″ and 16″ balloons
- Push balloon knot through a hole in the strip
- Alternate colors and sizes for organic look
- Leave some holes empty for fillers
- Work in one direction, keeping tension consistent
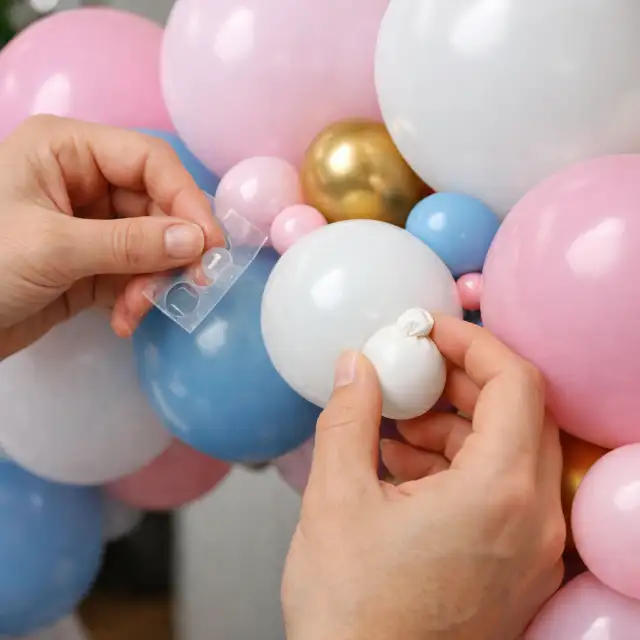
4 Fill Gaps with Small Balloons
- Apply glue dots to 5″ balloons
- Press small balloons into gaps
- Step back frequently to assess balance
- Add more until arch looks full
5 Shape and Mount Your Arch
- Gently bend the strip to form your arch shape
- Use command hooks or nails to secure endpoints
- Add fishing line at the center if needed for support
- Fluff and adjust balloons for final presentation
Pro Tips
- Work indoors: Wind and sun can affect balloon longevity
- Inflate same day: For best results, assemble 4-12 hours before your event
- Size variation: The key to organic look is varying balloon sizes
- Extra balloons: Always inflate 10-15% more than calculated for replacements
Frequently Asked Questions
Ready to Create Your Balloon Arch?
We carry everything you need: professional-grade latex balloons from Sempertex, Qualatex, Prima, and Funsational in over 200 colors, plus decorating strips, electric pumps, and glue dots. All orders placed before 12 PM CT ship same day from Memphis.
About this guide: This balloon arch tutorial is based on 38 years of experience supplying professional event decorators and helping DIY customers create beautiful balloon decorations. HICO Distributing has been a trusted balloon supplier since 1987. Need help planning your arch? Call us at (800) 358-4426—our team is happy to help you calculate quantities and choose colors.